|
(To
read Part I of this article, please click here)
OK, so when we left things off last
time, I was getting pretty frustrated with the pebbly finish on the
aircraft. The only thing left to do was to strip the paint job, and start
over. This time, I decided to take a different approach, and the main part
of this different approach was going to be to use acrylics. I've always
been a fan of enamels, but the Model Master Acryl line is really starting to
make a believer out of me. Plus, I figured that any kind of conflict
between an enamel color coat and the Future acrylic clear coat would hence be
eliminated.
The Strip Show
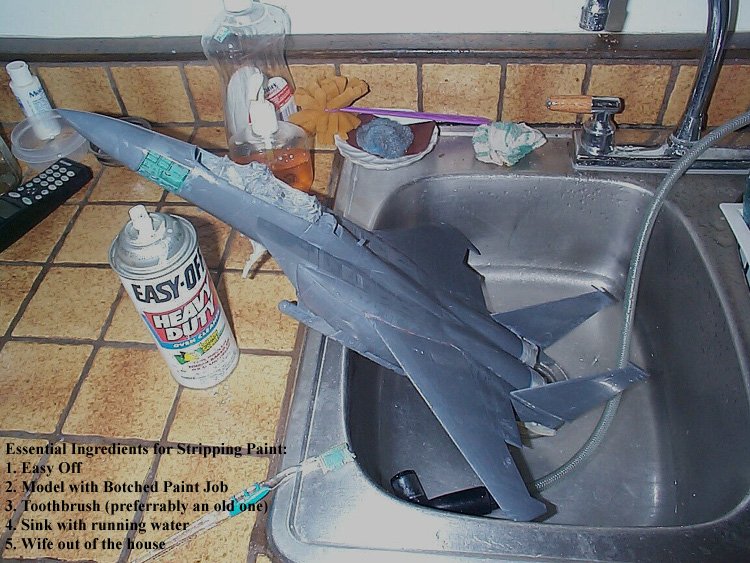
First things first: I got
myself a spray can of Easy-Off and a toothbrush, and got to work. I first
covered the completed cockpit with Parafilm to protect the finished cockpit and
pilots before proceeding (after all the work I put into that cockpit, I figured
that if I ruined it now, I might just as well toss the whole thing, so I wasn't
taking any chances). I did the majority of the stripping in the cellar,
and for the last of the finer removal, it was upstairs to the kitchen sink with
the whole project. I found it much easier to scrub the paint off with a
toothbrush after it had loosened, and then giving the entire model a bath under
the tap, rather than trying to wipe off all the goop. The results were
pretty good at this point, and after the paint was stripped, the model was
washed with dish soap and water, and left to dry for 24 hours.
White Eagle(?)
Now it was time for the moment of
truth: my first model painted with acrylics in over 15 years. I've always
heard that a good undercoat helps the MM Acryls to adhere better to the surface,
so I first applied an even coat of Floquil Reefer White to the plane. At
this point, the plane looked almost nothing like a Strike Eagle, but there was a
method to my madness here - I planned on bringing out the panel lines by
undershading them in black, and applying the Gunship Gray coat in various
thicknesses to represent fading of the paint (besides, have you ever tried to
paint Gunship Gray paint over Gunship Gray plastic?) With the white
undercoat in place, I then proceeded to airbrush the panel lines with Flat
Black. Things are looking stranger than ever at this point, but as I
applied the Gunship Gray over the aircraft, and experimenting with the heaviness
of the paint, I was able to get some subtle weathering effects with very minimal
effort. The nice thing about undershading is that if you go a little heavy
in the panel lines, you can correct this with the color coat, and it's as easy
as falling off a horse. The plane was set aside to dry a while, and I then
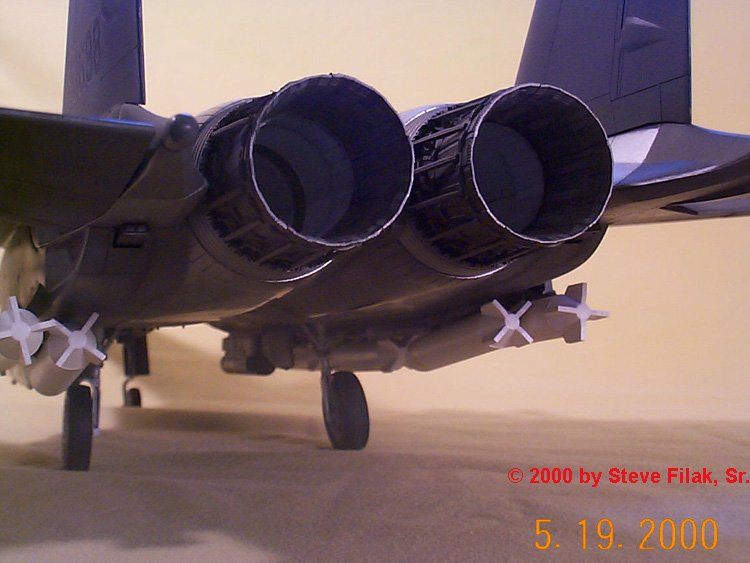
went to work on the afterburners while I was waiting. The interior of the
cans were sprayed with Flat White, and then weathered with various shades of
pastel chalks (again, a very basic technique, and it's very easy to get a
realistic finish in this manner). After about 24 hours, I airbrushed
several coats of Future on the aircraft and set it aside to dry for a few days.
This was followed by a very light
panel line wash (remember-the F-15E's in service are less than ten years old,
and the dark color of the aircraft obviates the need to really make in grimy
looking). Plus, I was going for a clean look on this airplane, and when
the wash was finished, the entire model was rubbed down with paper towels, which
have a light abrasive quality, and helped to bring out the gloss a little better
for the decals which followed next. I used a combination of the kit's
decals, and Superscale's F-15E Data Sheet. For the most part, these went
on with little or no problems, although several of the Tamiya decals were on the
frail side. This reminds me of a little haiku that I wrote a while back:
"Solvaset applied
to the frail Tamiya decal
causes great alarm"
I did manage to break a couple of
the Tamiya decals during application, but I also managed to get them back
together on the model with some water, a brush, and a steady hand. I'd
advise not using Micro Sol or Solvaset on these decals, and just stick with the
Micro Set, as they'll really shrivel otherwise. After all the decals were
applied, the model was once again set aside to dry for a few days, and it was
time to go to work on the ordnance.
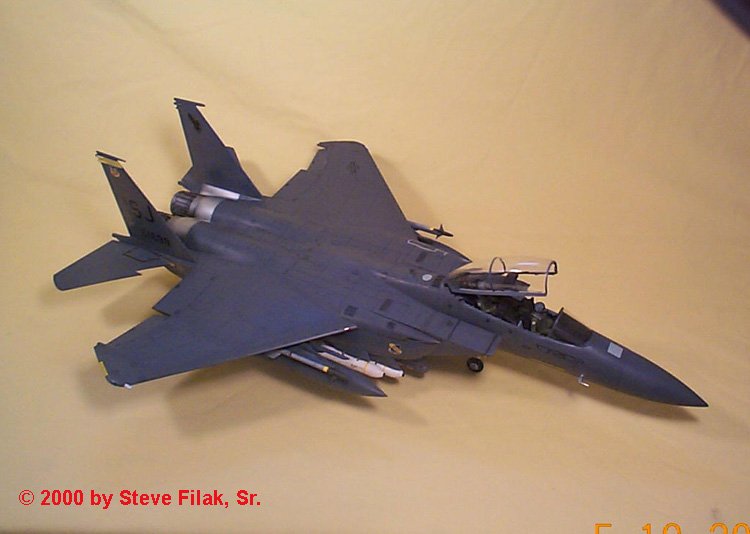
Things that Go 'BOOM'
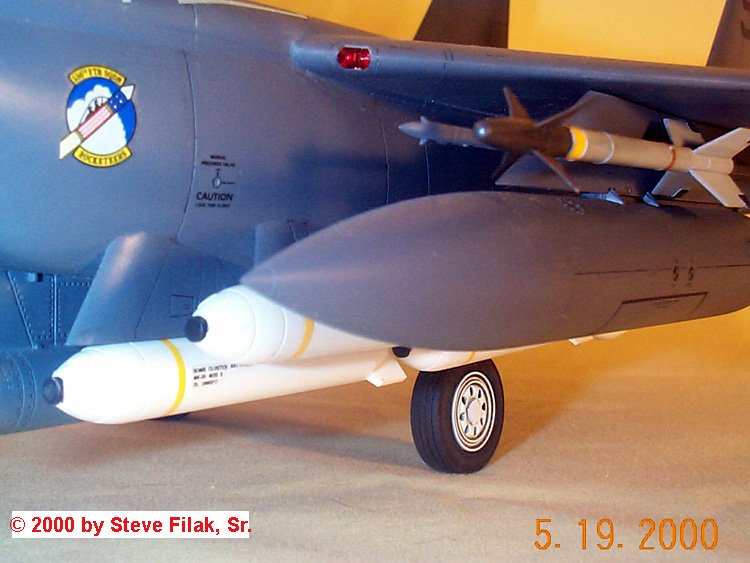
I decided to use a typical Gulf War
loadout on my F-15E, and this included 12 Mk.20 Rockeye Cluster bombs, two 600
gallon fuel tanks (as described in part I of this article), and two AIM-9L/M
Sidewinder missiles. Once it was realized that the Iraqi air threat was
virtually non-existent, the typical load of four Sidewinders was reduced to two,
one each on the outboard launch rails. The Rockeyes were painted Flat
White, airbrushed with Future, and set aside to dry overnight. The
Sidewinders were painted Light Ghost Gray overall (save for the nose, which was
painted with Metalizer Gunmetal), overcoated with Future, and also set aside to
dry.
Since I wanted to portray live
ordnance, the black coding stripes provided with the kit weren't accurate.
I used yellow decal striping for the coding stripes, and added the data stencils
from the kit's sheet. Likewise, I used the same technique with the
Sidewinders, and painted the rear coding stripe Flat Military Brown. After
drying, all of the ordnance was overcoated with Testor Dullcote. The sway
braces on the ordnance were somewhat of a challenge, being molded in, but aside
from being a little tedious, were no major problem, being painted with Metalizer
Titanium and a fine brush (yes, you can brush paint Metalizers, contrary to
popular belief).
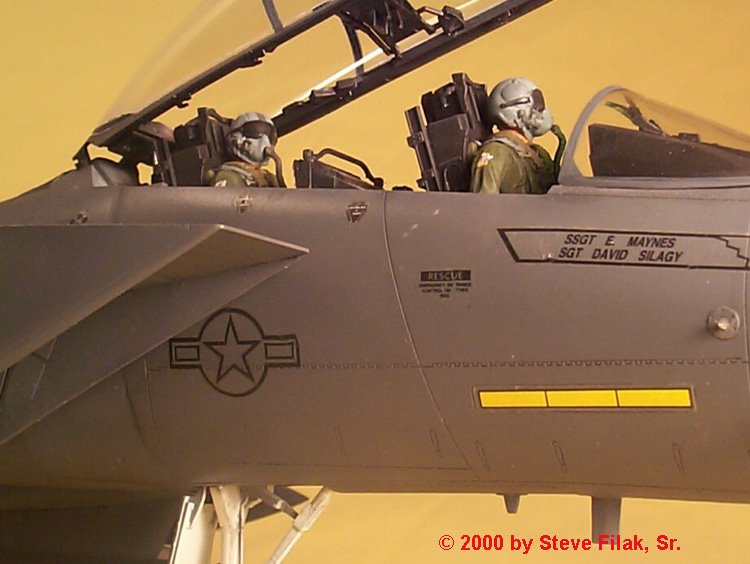
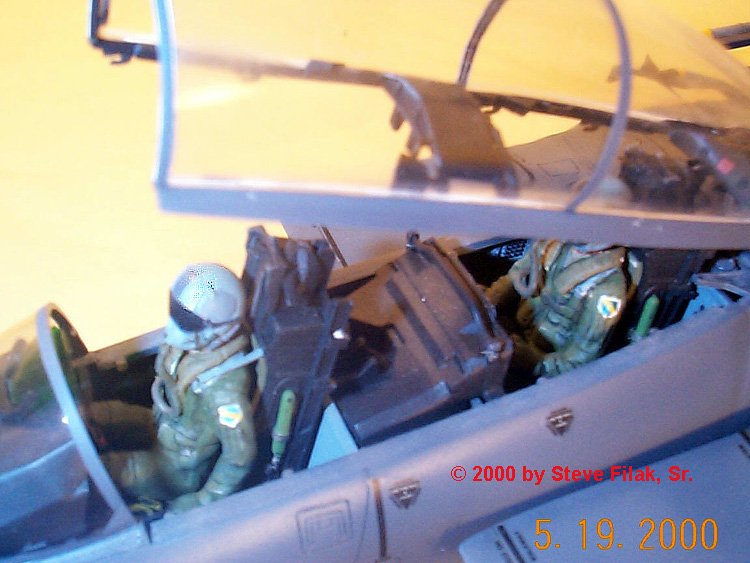
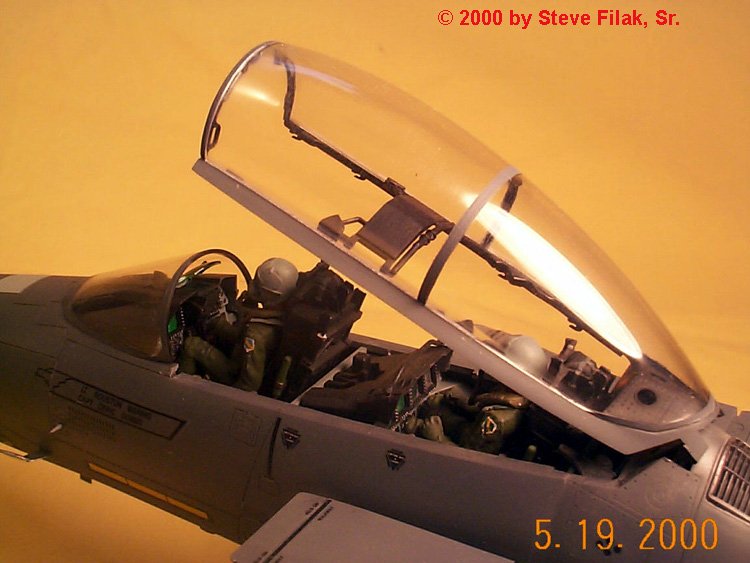
Finishing
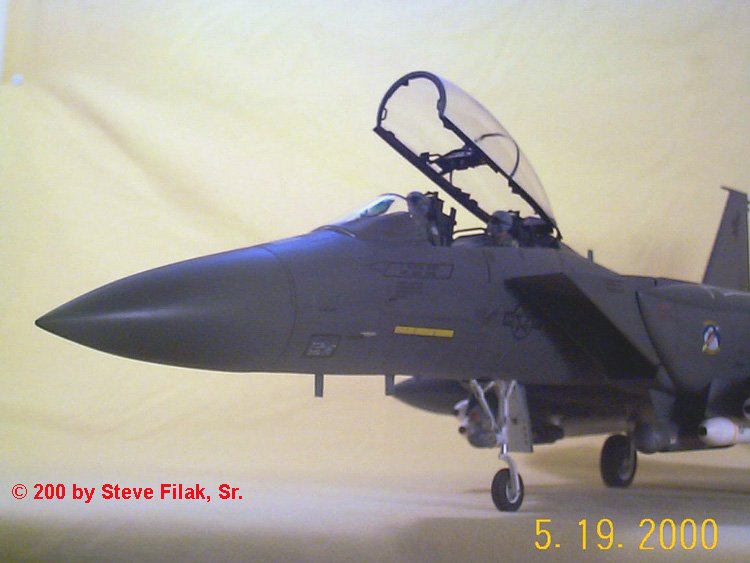
Among the last things left to do
were to get the 'glass' ready to be attached to the model. I polished out
the canopy and windscreen with an LMG polishing kit, masked with Parafilm, and
airbrushed the frames. I also added canopy hooks from an old Teknics F-14
cockpit set (since I had added the latches to the inside of the cockpit earlier
in construction. The model was overcoated with Testor's Dullcote, and all
of the 'fiddly bits' such as lights, antennae, etc. were attached. I then
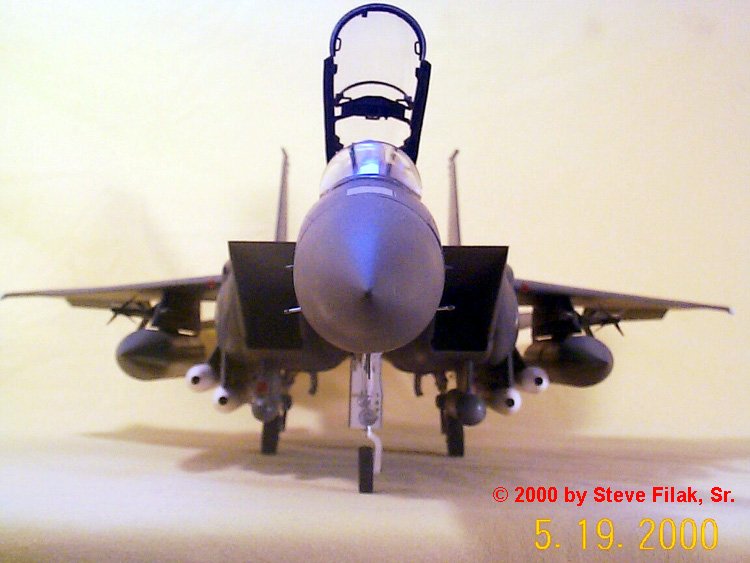
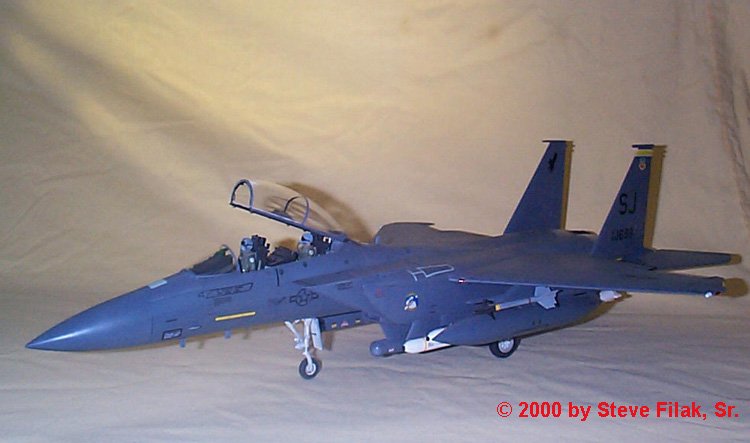
attached all of the ordnance, then the canopy, and voila!
The end result is shown below.
I really enjoyed this project, the only downside being the immense amount of
time it took to complete my MudHen (I started it back in August of last year,
and it was just finished several weeks ago). If you've got some serious
time to invest, then I highly recommend this kit, as the end result is well
worth the effort.
References
-
Verlinden Lock-On #20:
F-15E Strike Eagle
-
Detail and Scale: Aircraft
and Armament of Operation Desert Storm
-
Colors & Markings: F-15
Eagle
-
Various Magazine Articles
and Photo References taken by the Author
Steve
*Also,
please see the Walkaround section of this site for more
detail photos of the Strike Eagle.
|
|