|
 |
| Kit Box Art |
Picture of real
plane |
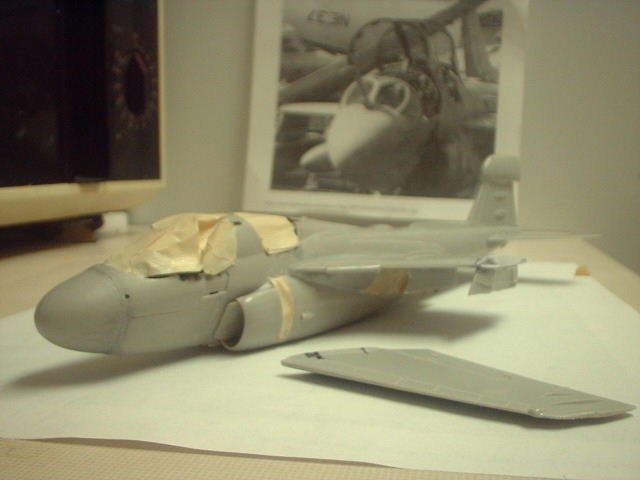
This is Hasegawa's re-issue of their 1/72nd EA-6B with new
decals, four True Details GRU-7 Ejection seats and an Eduard
Photo Etch set. The kit was started and then put on the shelf
several times due to frustration before I eventually finished it
almost a year latter. Detailing in 1/72nd can be very difficult,
especially when things don't fit, parts break, you have painting
problems, decal problems, and difficult tiny detail parts. I
don't recommend doing all this to the sane.
|
Click on image below to
see bigger image |
 |
I started with the cockpit and Eduard's PE
instrument
panel which replaces the Hasegawa decals, although there is side
and a center counsel in the rear tub that Hasegawa provides. The Eduard set also includes the keypads for in-between the
knees of
the rear ECMOs, but you have to add the base to them (from
plastic).
| Click
on images below to see bigger images |
 |
 |
 |
I chose to add detail to the rear bulkheads using
evergreen plastic strips and tubing. I also added the canopy
locks and the fairing around the rear of each cockpit associated
with it. The True Details GRU-7 ejection seat doesn't fit into the
Prowler's cockpit tub (I think because Hasegawa made it too
small....not True Detail) and I had to sand down the sides of the
seat. I figured this would be better than using the kit seats.
First though I did actually cut the tub into pieces in an effort
to fit the seats, and then found that the fuselage was too
narrow to fit the wider tub (even though the fit check I did
before showed a lot of room to play with). Unfortunately when I
glued the tub back together it was even smaller (due to the
plastic that I had cut out). Eventually I got everything fitting
together (although the seats are tight against the sides, not
exactly accurate) and I kept on plugging ahead.
| Click
on images below to see bigger images |
 |
|
 |
| After I finished
the cockpit (except the rear bulkheads) and painted the seats, I
started to move onto the avionics bay that the Eduard set
includes, only to find a big fit problem here too. I don't think Eduard ever built this kit because they would have seen that the
top of the bay hits the bottom of the cockpit tub. In order to make it fit (tightly), I had to sand the tub so much that the
top of the bay will almost poke through. I found that the center
of the tub under the Pilot/Nav center counsel is the worst spot. I worked this down with a file to make a channel for the edge of
the bay to touch it. The avionics boxes are provided in the Eduard set, and details in the bay were added with wire with the
Lox bottle being a lead weight painted and glued into the mount Eduard provided. |
| Click on
images below to see bigger images |
 |
 |
 |
|
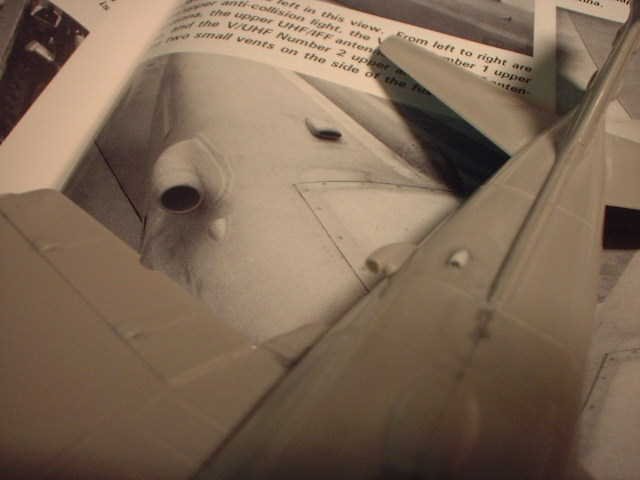
Onto the exterior of the kit, I joined up the
halves and the fit was decent. At this point it is worth noting
that the kit has a few external inaccuracies, especially for me
to make a block 89 aircraft (I used detail and scale's drawings
on the differences for this).
| First and most obviously is the
small intake on the rear right side above the engine exhaust (looking at it head on), should be deleted, and the vent
just above the exhaust should be deleted. The left side is still
the same but there is an extra, small, intake in between the
other intake and the ventral fin that is missing and needs to be
added.
Also underneath in the front there needs to be two "pipe"
intakes added over the "triangle" intakes just behind the nose
gear well on either side, they are same size and shape as the
ones on either side of the engine access panels behind the
boarding ladders.
|
|
Click on images below
to see bigger images
|
 |
 |
|
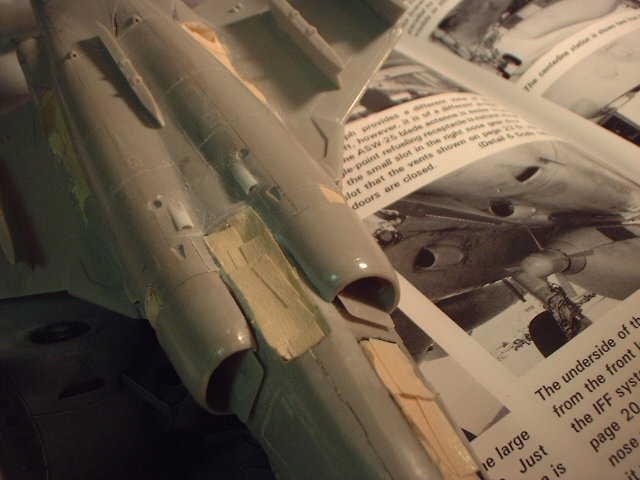
I of course drilled out all of the kit intakes
(the small ones mentioned above). Also there is a panel line at
the rear underside near the engine exhaust that is missing, this
is for an access hatch that is removed often and shows up quite
well in every photograph of the rear.
| The exhaust nozzles
themselves are inaccurate, being one part and not two, the outer
being a notched piece that is part of the hatch mentioned above,
and the inner a straight pipe. To correct this I cut the
existing nozzle in this shape and latter added the inner pipe
(Evergreen Tube) after painting the metal fairing on the
fuselage sides.
|
|
| FEATURE |
 |
|
1/72 Hasegawa EA-6B
VAQ-136 CAG Bird part
2
|
|
|